


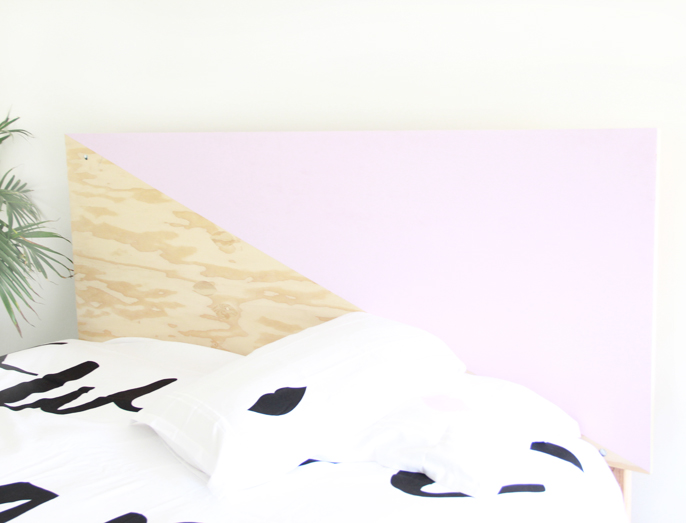
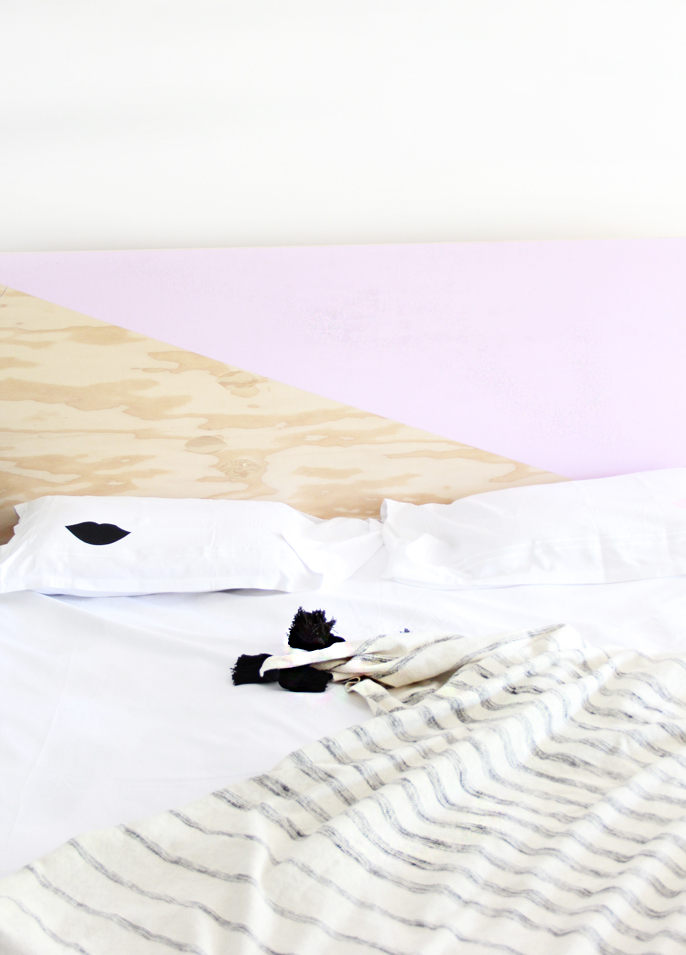
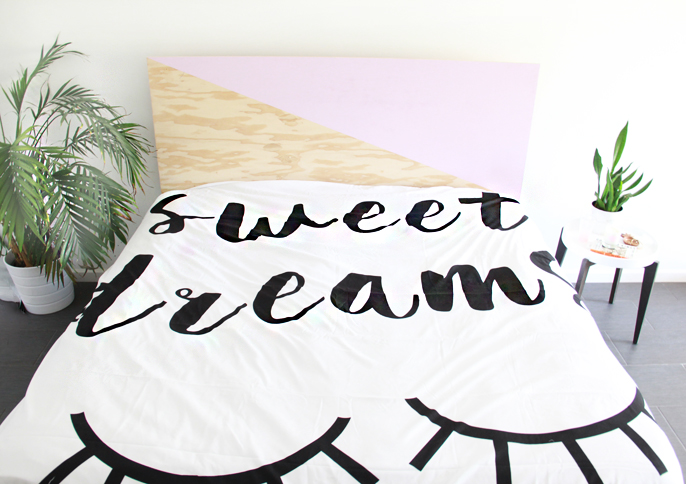
I call it a his/hers headboard. Half painted in a blush pink and I sleep on the pink side and Nick sleeps on the unpainted wood half. (Or if we are honest here, Nick sleeps on the edge of the bed and I am like a sprawled out starfish… I love you bebe)
I love it- I like a minimal, clean space, hence one of the reasons we never invested in big bedroom sets. But, I also love pops of color and this is a perfect match.
How To Make a Plywood Headboard
Materials: (our measurements are for a King-sized bed)
Plywood
Painter’s Tape
Paint
Sand Paper or Sander
Directions:
Sand the wood to soften it, pay particular attention to the edges, they will need more sanding. Wipe clean.
Place your painter’s tape across the middle at an angle.
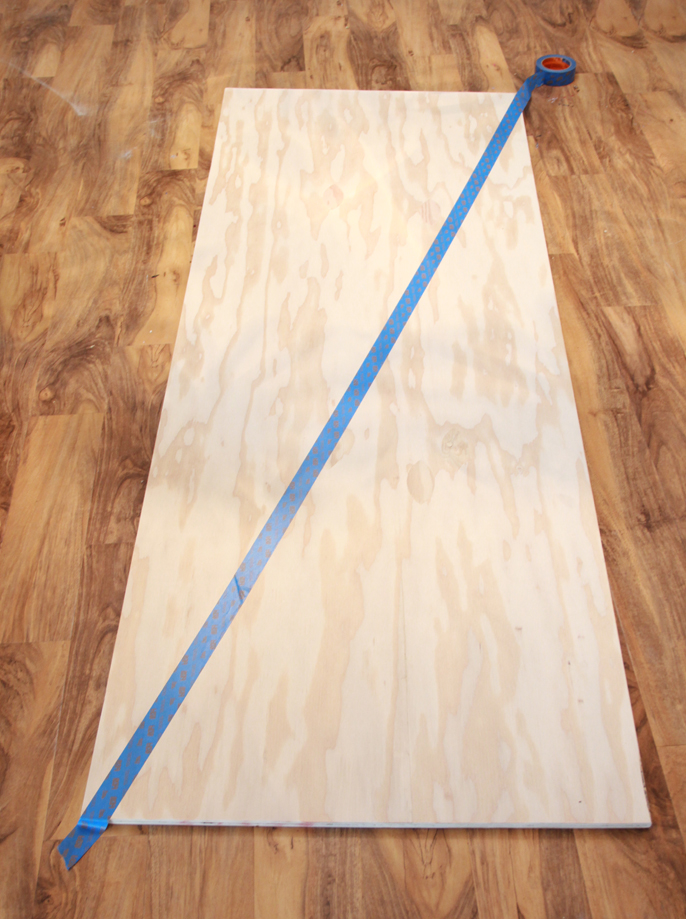
Paint. I used two coats and immediately lift painter’s tape after second coat is painted on. Let dry.
Attach to bed (we used some 2X4’s and bolts)

Shutterfly was kind enough to partner with me for the headboard- they just released new bedroom designs! You can design your own duvet cover, pillow cases, blankets etc. They also have many pre-made ones to choose from- I designed a Sweet Dreams duvet cover and some coordinating candles and pillowcases– with some cute lip prints & eyelash winks 😉

I designed the duvet cover with Sweet Dreams- in hopes the kids will let us sleep. It wont work, but it’s a nice sentiment.


The candles smell like pink grapefruit. I heart them.
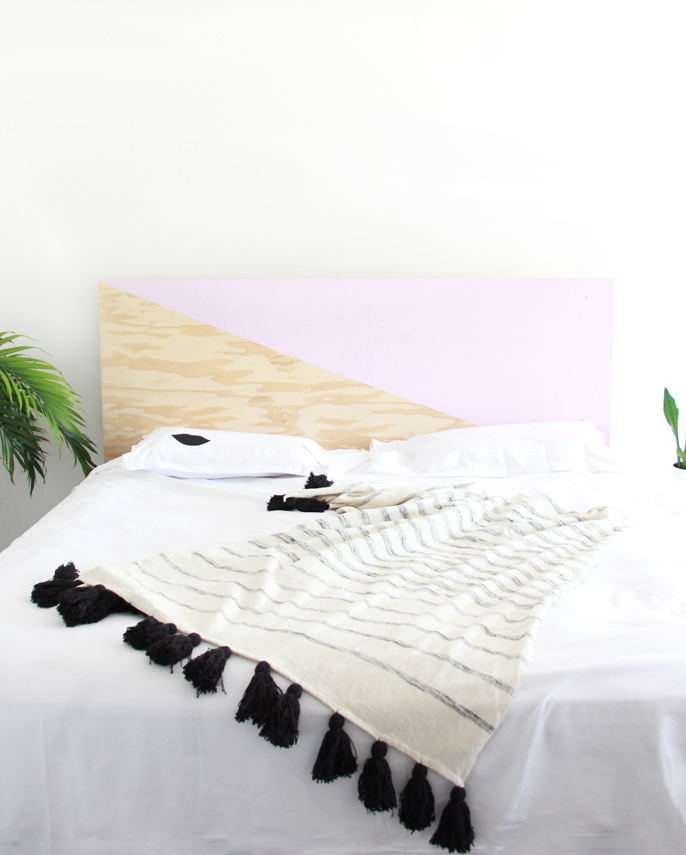

Our bedroom is not complete, we do not have any bedside tables or even a dresser, lol. The bedside table you see here was a plant shelf and used to have a fern on it. The fern is a goner, so I am borrowing it until we find more pieces to fit our bedroom. Ideally, I would like to DIY a bedside table but I have not liked any of my sketches yet. So, we will see!
A Bubbly Life is on BlogLovin, Instagram, Pinterest, Twitter, & Facebook – I would love for you to join me there!


[…] Paint a piece of plywood to create a brand new headboard that really […]
[…] Proyecto A Bubbly Life […]
[…] Foto […]
[…] A Bubbly Life […]
[…] Paint a piece of plywood to create a brand new headboard that really […]
[…] DIY How To Make a Painted Plywood Headboard – A Bubbly Life […]