


More copper pipe projects: Copper Pipe & Concrete Cake Stand Copper Pipe & Marble Plant Stand/Sidetable
I kind of love it when I get to make a DIY that is for ME and that I need to use on nearly a daily basis. My babies and freelance work take up most of my time (and I am NOT complaining!) it just feels great to do something I love for me (Am I right, Moms?)
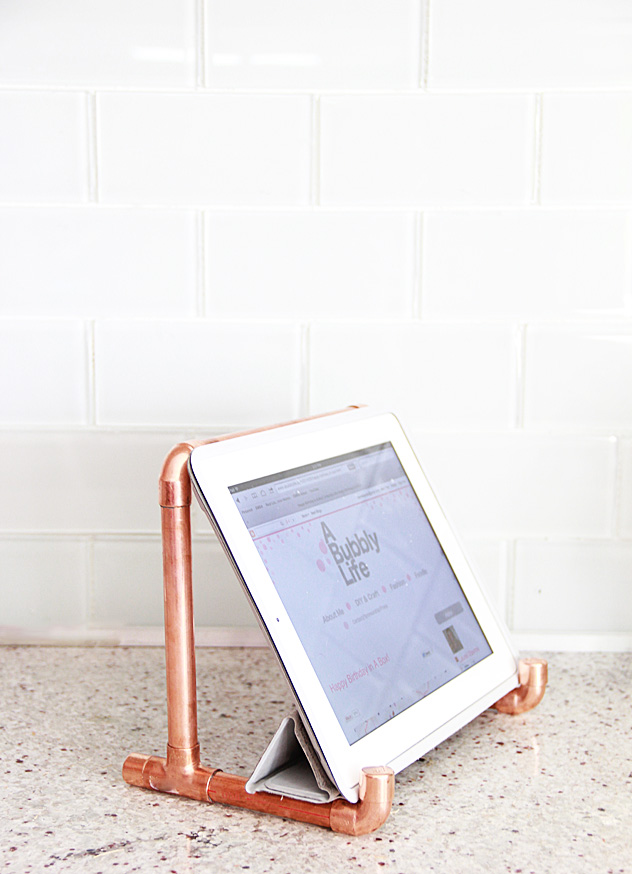
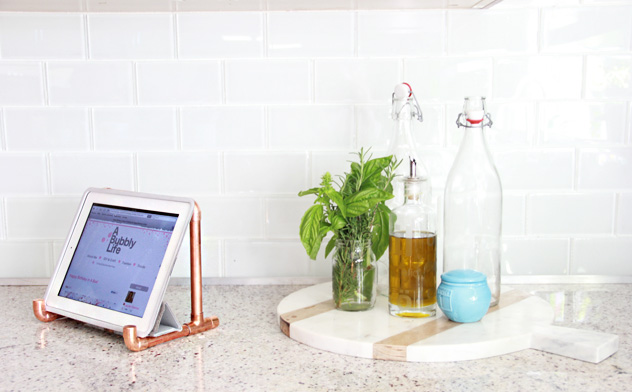
I desperately needed an iPad holder in my kitchen- great for recipes, but really, my kitchen is also for dancing. iPad holder = totally necessary.

I promise you this is SO easy. It took me longer to write down all these directions then to actually make the iPad holder. Especially because I did not know all the terms for the pieces and had to bug my husband for the names. I really should have written it down when I was at Home Depot! I never claimed to be a DIY expert- I am a “I see things that I think would fit and get incredibly lucky that it works expert” Details like the name “street elbow pipe fitting” are brushed to the side…

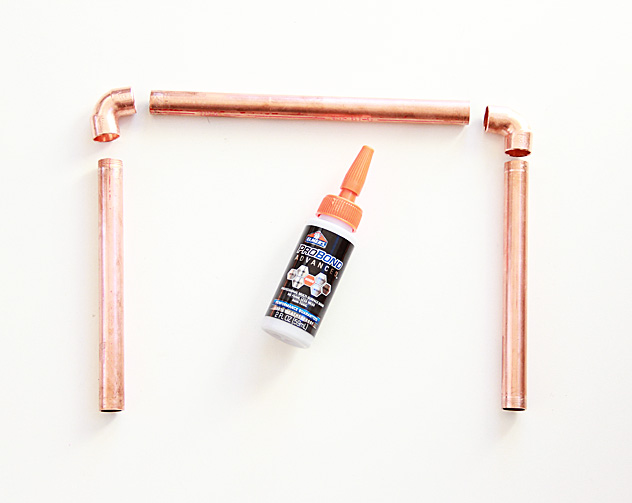
Materials:
1/2 inch Copper pipe (I purchased 5 feet, which was the smallest length available)
All to fit 1/2 inch piping-
Glue (I used Elmer’s ProBond Advanced because it was what my contractor recommended (we are remodeling) It worked awesome!)**
*All can be found in the plumbing section at your home improvement store!
**You can solder the pieces together (which is what my contractor said to do!), however, I keep things simple around here, so glue it was!
The copper pipe materials were only about $16, since I had a pipe cutter and the glue already it made for a very inexpensive iPad holder! If you need a pipe cutter, they run about $15.

Directions:
1. Make your cuts. My measurements are based on the 3rd generation iPad but I checked the specs on the iPads and it would work with any iPad (except the mini, because, well, that is mini…)
Have you ever used a pipe cutter? This was my first time, all you do is twist until the pipe is cut- it is SO easy! (Clearly, I am easily entertained by new diy tools 😉
Update: How To Clean Copper! My iPad holder gets particularly grimy because I keep it in the kitchen, I googled and tested a couple remedies for cleaning and the shiny is brought back by- cutting a lemon in half- sprinkle the exposed side of a lemon with some salt and rub it all over. Then wipe clean with a cloth. Gets SO shiny (if you let the copper get really dirty (I usually do cuz I forget about it…) it will take more scrubbing though!) . I also tried ketchup (another method I read about) but it didnt work for me.
Measurements:
1- 8 inch
2- 4 inch
2- 6 inch
2- 1 inch
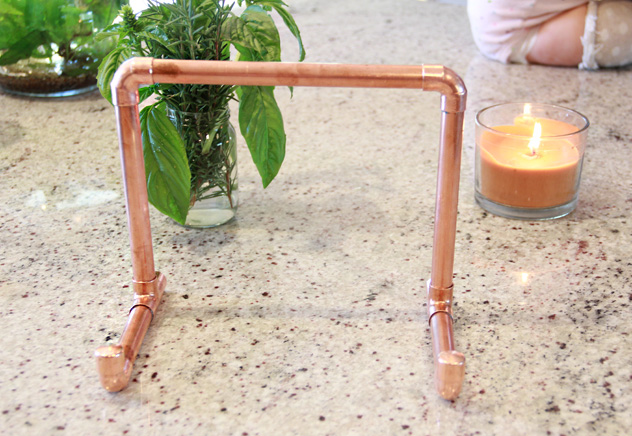
Step One: Glue the 8 inch and 6 inch pieces to the street elbows:
Step Two: Glue the tees to the bottom of the 6 inch pieces.

Step 3: Glue the 4 inch and 1 inch pieces to the tee.
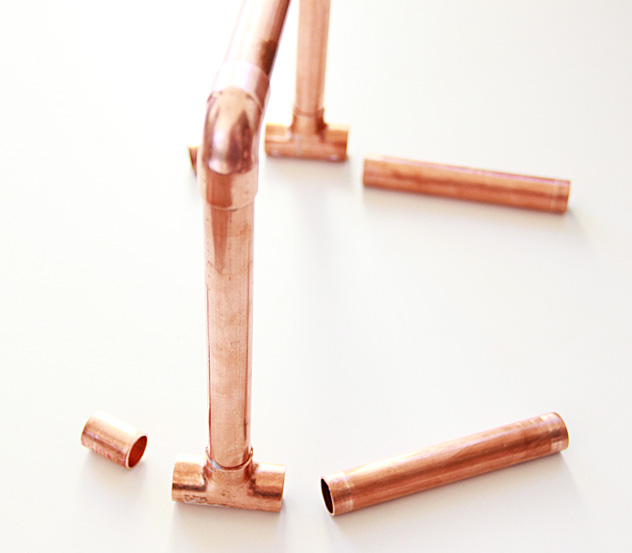
Step 4: Glue the street elbows to the end of the 4 inch pieces.

Step 5: Glue pipe caps to each exposed pipe. (front and back)

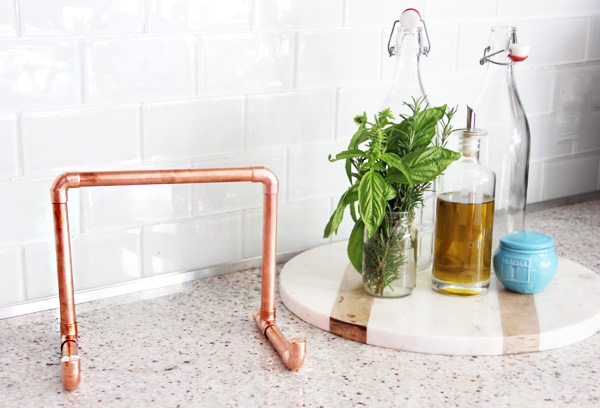
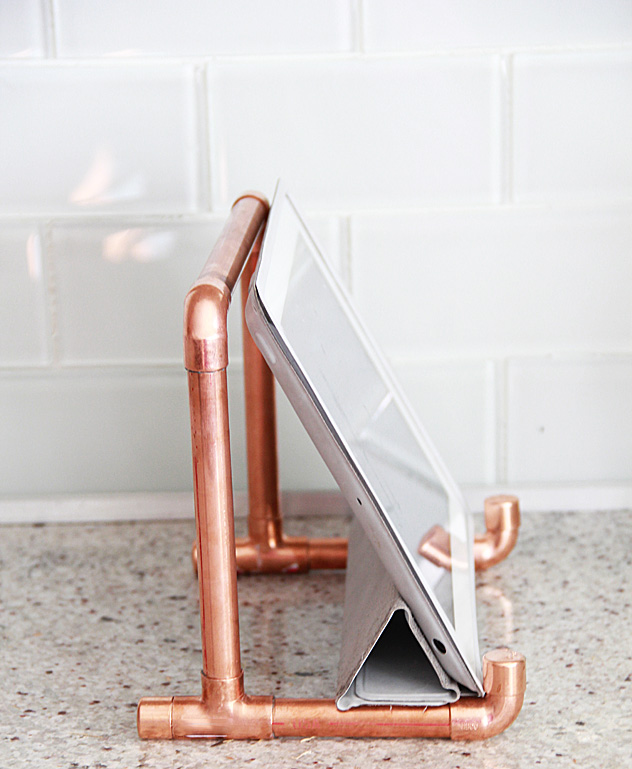
And the final product:
I included this real life shot, as my husband was feeding little Colette while I worked and I did not notice her adorable chubby thigh was in picture til later.

A Bubbly Life is on BlogLovin, Facebook, Twitter, Pinterest & Instagram– I would love for you to join me there!


Would this also be stable enough for cookbooks?
Thank you
Hi Sabine!
It would work for smaller cookbooks!
Laurel
[…] Diy Copper Pipe iPad Holder […]
[…] DIY Copper Pipe iPad Holder from A Bubbly Life Here is a really useful iPad holder for your home – and it looks great! For the full DIY post click here. […]
Ive just made this for my wife for her birthday. thanks for sharing this!
Thats so awesome, happy birthday to her!! thank you so much for leaving a comment and letting me know!!
[…] A Bubbly Life’s DIY copper stand tutorial is a practical and fab present. It can be used as a tablet stand, book holder for the bath or even a cookbook stand! […]
[…] Diy Copper Pipe iPad Holder […]
[…] abubblylife.com […]