


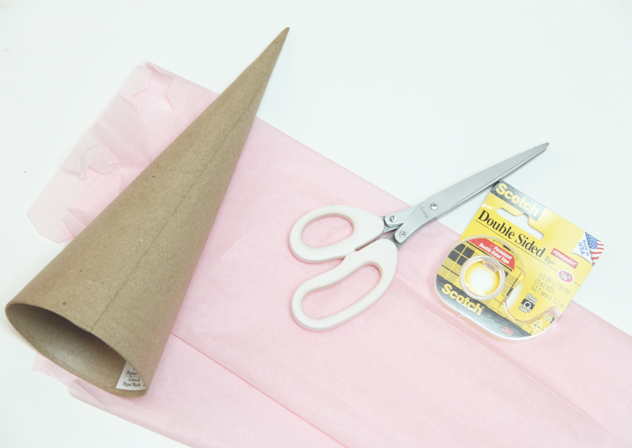
Materials:
Cardboard cones
Tissue paper
Fringe scissors
Double sided tape or glue*
*I used double sided tape because I do not want the trees to be permanent and want to switch it out for a future craft.
Directions:
Cut strips of fringe using your fringe scissors, approximately 1/2 inch each.
Working from the bottom up, wrap fringe around cone and tape to close it.
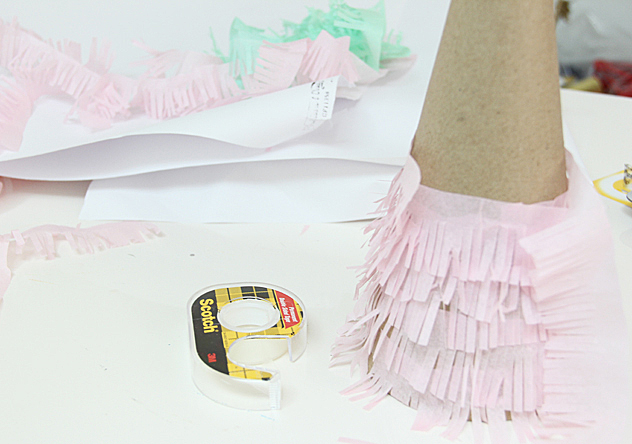
Continue until you reach top of your tree!
Be sure to check ALL of December (archive in sidebar) for Sooooo many holiday DIYs- I am posting 5 days a week, today is the last DIY of the series but I will have a couple more posts before Christmas!Hope you are enjoying the holiday series!!
A Bubbly Life is on Facebook, Twitter, Pinterest & Instagram– I would love for you to join me there!


[…] DIY Fringe Christmas Trees by A Bubbly Life […]